
| STORE
HOURS 9 TO 6 CDT GMT minus 5 hours Monday thru Friday Do not call on Sat. Sun. please |
![]()
![]()
 GETTING
TO WORK-
GETTING
TO WORK- Again, this is long. Feel free to copy to file or print one copy.
This is copyrighted
though,
so it is illegal to mass produce any part of this book.
With this chapter the plot thickens greatly. Piano tuners make
a lot of money fixing little things and picking toy soldiers and quarters from
between the teeth of pianos. They would like to keep this a deep dark secret.
That would be just fine if it were not that many piano owners pay dearly to remain
ignorant, and they may wait for months before the tuner finally shows up to pick
the latest ripe quarter.
I once got $20 for opening an organ at a Masonic temple and removing a quarter from the circuit board. It took about ten minutes, but I had to charge them in order to meet my expenses. Why not pick your own apples and quarters? It is very unreasonable for any tuner to resent you for reading this page and saving the cost of a service call.
Most tuners are reasonably honest, but times change. There are tuners out there lurking in dark allies who will pocket the quarter and bill you $90. They will tell you they had to adjust the grommets on the ferskertzin rods and replace the oscillating gizmuckus brads.
My job so far has been to raise your piano literacy. From here on, we will take problem by problem and try to help you solve it. We will start with the most common things that go wrong, then we'll move on to the less common, and finally to the bizarre-- those things that go bump in the night.
At the end of the book I have a Catalogue of piano repair parts and a set of tools you can order from me. You will probably need to order from me because most piano suppliers will not sell parts to you. They only deal with tuners. I told you before-- it is a tight club. In some repairs I will also try to tell you how to improvise with things laying around the house. When your tuner comes and sees your make-shift repair write down his comment and send it to me. These would be fun in later editions of the book, or in Updates and Forum . Some tuners have been known to actually HELP make such repairs, so I should not be too cynical.
Before we go to trouble shooting, I want to give detailed instructions on how to open up your piano to get at the innards and fix it. Thus, Chapter Five is given only to that very important skill.
![]()
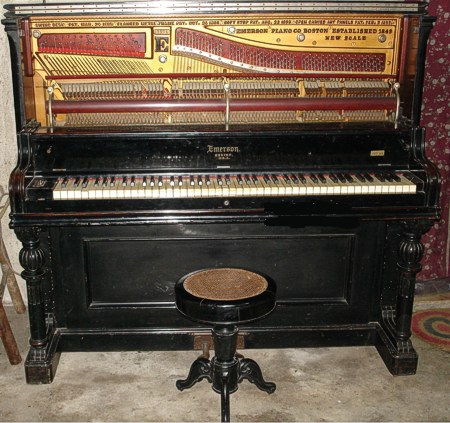
We are talking here about the big old monsters, and we will insert exceptions and advice on spinets and consoles along the way.
If you have a Baldwin upright, life will be easy for you. Work the piano away from the wall about 20 inches. Grab the level board just above the key cover, and left it up and back. I prefer to lean the thing against the wall with a song book protecting the wall. There is a prop inside the dingus which you may pull down, catching it on the piano to hold it up. This Baldwin innovation is wonderful-- until you rise up quickly and knock the prop beegeebers, whereupon; the thing will come to rest suddenly on the back of your neck. A couple of other brands use variations on this method.
If you have an Everett, which is a very good piano, you must remove two nuts in back holding the top on. Find or borrow the right size Allen wrench to do this job. If you try to pry the top open in front with a screw driver, I shall send the boys around to break your fingers, ya hear? There are some retarded tuners who do this, especially on school Everetts. They ought to be called back to repair the damage. If you want to make life easier next time, take the weird nuts around to the hardware store, and ask the clerk to help you find two normal hex bolts to replace the originals. Saw them off short the same length as the originals, and dress the threads on a grinding wheel.
The rest of you sincere flatlanders who don't have a Baldwin-- stand facing your piano, and lift the top lid up and lean it back against the wall. Be careful-- it may be missing a hinge or hinge pins. You could end up dumping it behind the piano and trimming all your fingernails in the process.
If it has hinge pins, and if you plan to work on the inside for more than a day, I suggest you remove the hinge pins and carry the top away. This eliminates the chance of the lid falling forward later on your wee head. Some pianos have a hinge clear across the top, side to side, down the middle, allowing you to fold the top back on itself.
There is an old European invention in which the top lifts up from one side, usually the left, hinging along the side at the opposite end. Take out the hinge pin or pins, and carry the top away. DO NOT try to lean it this way or that, leaving it attached to the piano. You are asking for disaster.
Now, peek over the top of the desk (that big vertical piece in front of you that holds the books up). In the left and right upper inside corners should be hardware to release the desk. Move it around until you can see that it has released the desk. Some desks have no hardware-- just slots on pins on which the desk hangs.
Look over the top at the lower edge of the desk. Do you see two metal dog-leg hinges down below at either lower corner? If so, they either pry off of pins at their anchor points at the back end of the hinges, or you have to take the screws out of the front end attached to the desk sides. Please do not try to reach down from above and detach them (read the story of the cat in the piano). Exception: Sometimes these hinges are attached to the two side vertical pieces which are attached to the desk and come out as one unit-- if so, leave the dog leg hinges alone and go on.
Lift the desk up and out (with the slotted mountings, slightly away from you or inward at 45 degrees) then remove it, lifting it first inward and up, then toward you and out. Now, you most likely have two vertical posts on either side with two screws in each post. Remove them. Most newer smaller pianos don't have these posts, but some old uprights do. Some attach the posts to the desk (as mentioned above) so that the whole mess is lifted away at once after turning some hardware in the upper inside corners. Many pianos, especially spinets have screws in the upper inside corners which you need to remove. On guard-- most old uprights have loosened up in the desk department, and they may fall apart in your hands as you lift them out.
Exception: A couple of brands (Cornish is one) have a horizontal bar that lifts off right on top above the desk, then the desk comes out as described above.
Some old uprights have desks weighing as much as 80 pounds. Why? Answer: Lunacy. If you have one of these, get a friend to help you lift the desk assembly off.
Under the bottom of the side posts, after you remove them, you will see a screw on each end of the horizontal shelf above the keys. Remove the screws and the flat shelf held by the screws. Some very old pianos, and some very new ones, allow you to simply lift and carry away the flat piece-- no screws, and the key cover may come with it. This is also returning to some consoles made in Japan, Germany, and Poland. Try it, you'll like it.
Pull the key cover over into the closed position, and look down behind it. You will see screws in a wooden bar holding it to the end blocks. Remove the screws and set the key cover aside. Old uprights often have hinges at this point-- remove the screws.
Some upright key covers are like a grand piano style. You may see set screws at either end (lower extreme corners of the face) when you have the key cover all the way OPEN. Back these set screws off about a quarter inch, then lift the key cover out.
A few have only one set screw at one end. Back it out, lift that end out and clear of the side arm, and pull the key cover horizontally to that side. The other end is mounted on a pin.
A few uprights have a loose key cover. Tip it about 45 degrees toward you and lift it up and out. A couple brands have a loose key cover, but you have to raise one end or the other first out of a slot, then pull the other end horizontally out of a hole. A couple of brands require you to remove the screws under the end blocks in order to remove the key cover. Get under the piano and do so. Grab the key cover, and it, along with the end blocks and other hardware will all lift away, "the legs all dangling down-oh". Baur does this.
You now have the piano open. If there is a horizontal piece still there, as in almost all spinets and consoles, remove it. Use a small screw driver to take out the weird little round nut with the slot down in the hole. [ When you replace that board, push down on it moderately in the middle. If the keys depress, raise the lower round nut, or unscrew the wood screw, which the board rests on. Stop raising the nut of wood screw when the keys do not depress with pressure on the board. ] NOW, you have it all the way open.
All pianos have the keys numbered from 1 to 88 beginning in the base on the left. The exception would be some spinets which have two pencil lines to help orient the keys when you have to replace them after repairs. Since the numbers are almost always vague (except on Japanese pianos) number them on the wood with a pen-- 1 to 88, left to right.
If you get to the end, and you have 89, so what? You still have a piano. But if you come up with 87, you have two of something. Go back and make one of them a decimal. If you come up with 85 keys, you have a piano that has a shortened key board. Sorry about that. If you have 97 keys, you have a Bösendorfer, and, considering the price you paid for the piano, you ought to send the keys out and have the numbers gold embossed on them, right?
Before going on, remove all obvious gum, subway tokens, Lego blocks, and "First Baptist Church" birthday pencils. For now, only remove what you can reach without removing piano parts. AFTER you salvage any parts which look like piano parts and set them aside, get the vacuum cleaner and a smallish paint brush, and clean up obvious junk and dust.
While you have the vacuum on hand, get down under the key board and locate the metal or wood clip that holds the bottom board in. If it is metal, push up on it, and pull the top of the bottom board out. If it is wood, you may have to push up on it, or you may have to swing it sideways out of the way. Don't break it.
AFTER you have checked for hammer heads and bits and pieces of the piano that may have fallen into the bottom, vacuum in the bottom of the piano.
You now have the upright about as opened up as possible. If you have a spinet, the process is about the same. Most variations you find will become obvious to anyone with the aptitude to get out of a clothes closet or a Ford.
Once you have the piano open, take the time to repair any hinge screws or hanger points where pins or screws have torn the wood away. Fill the enlarged hole about half full of toothpick pieces and Elmer's carpenter's glue, and replace the loose screw or pin. Left to get worse, these worn points can result in serious damage later.
![]()
The upright action that faces you is the mass of nearly 1000 moving parts. It sends your key blow upward to the hammers, and the wire is struck. I am assuming you will need to do some tinkering on the action. But, it would be very smart to read the problem solving area to see if you can fix the action problem without taking it out of the piano, especially on an upright. Browse the list of sub-topics in Chapter Seven in the Table of Contents.
First, from below, remove all the sticks at the left and / or right of the action which come up from the pedals to throw the hammer backrest forward for quiet playing and for damping. Story and Clark has a stick which comes right up in the middle of the keyboard-- Remove it. You may have to pry the stick out by lifing up on each stick and pulling it out of the hole at the bottom. Don't lose any rubber hardware on the end of the stick. If the pedal stick in the back left corner behind the action is going to be any problem, disconnect it. Some pianos have one pedal stick which is solidly attached and can remain in the piano. If in doubt, remove them all.
If the piano has a practice mute or other gadgets above the action, which are not directly part of it, remove them. On late Yamahas and Kawais there should be a thumb screw to do this. Old upright mutes come out by removing screws. Don't lose the felt washers.
There will be three thumb screws or slotted screws (often four), holding the tops of the vertical metal braces against the frame of the piano. Take the thumbscrews off. You may need pliers to do this if they have been there a long time. A few pianos attach the end braces to the side of the box. Don't lose the washers since they are there to position the action. Late Yamahs and Kawais have big plastic knobs which unscrew. As you remove the last thumbscrew, hold the action with one hand because it could fall right out of the piano, which is really more action than you need.
The next step is a one-person job. DO NOT try to do it with two people please. With both hands, take hold of the vertical upright metal braces in the center of the action. Hook your fingers in them, with your thumbs over the hammer back rest bar, so that you are holding the action mainly by the metal braces with your index fingers and thumbs. Tilt the action away from the thumbnut pins. Lift the action up and out of the piano.
Surprise-- it won't come. This is either because you missed a thumbnut, a pedal stick is holding it back, or the metal braces are jammed onto the bolts or pins holding it. Pry the braces toward you with some tool that seems handy, going from one to the other-- take your time please. It will eventually be ready to remove. Keep one hand on it as you pry at it so you don't lose control of it and drop it.
Be careful-- As you lift the action out, in some pianos, there will not be enough room to just lift it out directly. You may have to move one end out, move a bit sideways while suspended, then continue on out. Others require that you lift upward quite a bit before the action clears the wood work. Also, don't catch the dampers in the back of the action on the anchor bolts sticking out which held the thumbnut. Hold your tongue just right. Be careful not to move back into the piano during this process. You could trash some dampers. If you do damage, don't panic. It can be fixed.
Most actions have small legs at the bottom of the action to sit it on. They are not very substantial, so store the action leaning the HAMMER SIDE against the wall. DO NOT lay the action face down on the floor. You have no ideal how discouraging it is to look down at an action that was stepped on in the dark or used for a Tonka Toy bridge.
![]()
If you have a spinet with a "drop action," you are in for it. If you have average or better mechanical ability, you can remove the action, IF YOU TAKE YOUR TIME. Notice that the back ends of the keys have rods connected which go down into the lower parts. Take a tour from below, and get an idea how the beast works by watching and hitting keys.
In some spinets, the metal vertical action braces have a hook shaped molding about midway down in front. If you have these, you are blessed. Find a rod or stick that will fit in these laying in their cast cradles. Gently remove all of the rods from the back ends of the keys. Some are rubber and slip out of metal tabs horizontally, while others have wood grommets which lift up and out.
If the washers or grommets at the top of the rods are rubber, you better stop and consider if you want to trash them. On older spinets most of these will disintegrate as they are disconnected. You can order them from piano supply or from me from my Catalogue -- under Action Parts, look for Rubber Lifter Wire nuts.
If the elbows at the bottom ends of the rods are original and plastic, and if the piano is 50s vintage, beware. Some elbows ARE going to break. Do you have Vagias elbows on hand to replace them? If not, leave the drop action alone please. Order some Vagias elbows from my Catalogue before going on. Later in Chapter Seven I tell you how to install Vagias elbows.
All of the rods should be removed at the top ends by now. If you have the cast hooks on the vertical action braces, place one end of the stick down into the cast cradle of either the right or left vertical metal action bracket. Push the key drop rods against the action while you lower the stick to hold the rods against the action. When the rods are all secured, and the stick is laying horizontally in all the metal cradle , you can proceed to remove the action as above. But DO NOT knock the stick beegeebers as you back the action up and out. Consider securing the stick with string, bubble gum, or rubber bands at the far ends. You will be lifting it out of a hole, so work carefully.
If your spinet action does not have the cast cradles for a retaining rod, you must get a piece of cord. Tie one end to an end brace. As above, remove the rod tops from the keys, and work the cord along so that the rods are pulled against the the action parts. String the cord through every vertical brace as you go so that the rods don't sag back into the keys. Remove the action as described above.
A few spinet actions are screwed down at the bottom ends of the action vertical brackets. If so, remove the screws before lifting the action out. A number of brands have vertical brackets at the left and right ends which screw to the inside ends of the cabinet which must be removed. Don't lose any of the spacers in any spot which determine the positioning of the action!
Some well built spinets have the rods terminating at the top in a lever rail which is mounted on extensions of the action's three or four metal braces or brackets. There is no direct connection to the back ends of the keys. This action can simply be lifted up and out of the hole it is in. You who have this arrangement can thank the company that made your superior piano. I believe some Baldwins use this design.
However; some spinets have this arrangement, but the lever rail that holds the tops of the rods is mounted on the key bed. Unscrew the top lever bar from the key bed, and fold it back against the action and secure it, then lift out the action. It may be quite a trick to hold the action as you remove it. Sorry.
Store a spinet action very carefully so as not to damage the rods or their elbows. There are a few weird variations of this spinet arrangement which you may have to just study a while to form a strategy for removal. A couple of brands have curved wooden or metal extensions on the back end of the keys which drop down under the action to operate it from beneath. They make the action a simple lift-away job.
![]()
You should have numbered them by now. I still try to store them laid out in order, but it isn't necessary IF you numbered them. Simply lift them out, helping them off the pins, center and front, with two hands.
If you are removing the keys without removing the action first, here is an important item: As you remove each key, lift the "sticker" which is the vertical rod coming up from the back ends of the keys on uprights. This will make sure that you don't drag the felt piece off of the bottom end of the "sticker." If you have a console, lift the back check forward as you remove each key. If confused, go study the Diagrams of actions again.
Now, look under the keys. HA! There is the mouse you poisoned last fall, but all that is left is the skeleton. Also, you may find some real old time quarters without the copper centers adulterating them.
Acorns anyone? Dog food? You have a pack rat. If you have a mouse "bed-and-breakfast," you will notice a very interesting thing. In the three areas under the keys the mice will have defined very carefully: one area as the nursery where the nest is, one area as the pantry where the acorns and Purina dog chow are stored, and one area as the bathroom where the manure is. Now, how can you despise such tidy well organized little beasties?
If you have an old upright, look for ivory key tops which have been missing. They often fall down between the keys. Set them aside, and read the section on Replacing Ivories in Chapter Seven.
Once all of the collectibles, piano parts, and major animal bones are removed and sent off to the museum, vacuum the whole area. BUT BEWARE-- Do not vacuum up the white center rail felt bushings- round washers. Ditto for the green felt bushings at the front of the keys. Work around them carefully with the vacuum's crevice tool. If you vacuum them up, or if they are destroyed by moths and mice, you can order these from my Catalogue under Felt Parts.
If this is an old upright, spray the key bed area lightly with a "Raid" type bug killer to discourage moths and protein weevils later. Look for a spray with Pyrethrum in it. Do not spray the hammers, and NEVER the tuning pin area.
![]()
To open a grand piano, first, remove the desk. Slide it forward or backward until you find the notch, and lift it up and out. On many grands, the desk simply slides straight out to the front. Repair any worn screw holes by filling them with Elmer's glue and toothpicks (don't pack the hole clear full of toothpicks-- it will split the wood), and replace the screws. Use this method also on the lyre, or foot pedal assembly, anywhere a screw is loose.
Now, with the top DOWN, remove the two or three hinge pins in the top hinges. Call your friend to help you carry the top away. Beware of setting it where foot traffic will result in scuffing.
![]()
Removing the key cover varies greatly from one grand to the next as follows:
A. If the cover has a set screw at both lower front corners when you look at the open key cover, back the set screws out about a quarter inch, tip the cover slightly toward you, and lift it out. The screws may simply be through a hinge tab on the side-- remove screws and remove key cover.
B. If it has one screw in one similar front lower corner, but not the other corner, loosen the screw, lift that end up and outward clearing the side arm, then pull the keycover sideways. The other end will have a pin in a hole which will free the cover.
C. If there are no such set screws, tilt the key cover about 45 degrees toward you, lift it up and draw it out, and lean it in the corner.
D. If the above fails, your key cover may come out with the end blocks attached (see diagram). Get under the front of the piano, and look up. DO NOT remove the front big screw that holds a leg on. The piano could get one leg up on you. Remove the smaller screws directly under the two end blocks. On better pianos, these are big wing nuts that come out by hand. Now, get back up top, grab the key cover, and lift out and up. The end blocks will come dangling out with the key cover, and one of them may promptly fall on your toe. Enjoy.
![]()
There is a board just below the front of the keys about three quarters of an inch thick and two inches high. It comes off the grand piano one of three ways:
A. Under the piano three, four, or five screws hold it down. Remove the screws and remove the board.
B. The board is not screwed down but is held on by slots in the board which are wedged down over screw heads in the key bed. You will have to try to pry it up without damaging the finish of the piano. Enjoy.
C. The end blocks hold the front board on, and it will come away when you remove the end blacks, either attached to the end blocks, or as an afterthought..
If there are paper washers or bits of wood and cardboard behind this board, you must replace them the way they were when you reassemble the piano later. This is to keep the board from binding on the front of the keys as they go down.
![]()
The grand action extends back from the keys into the piano. Look back in there and marvel that the designer made it fit. If he got it in there, you can get it out.
You must not ignore my next suggestion-- go get two or three pieces of poster board wide enough to extend along the whole width of the key board. Don't argue with me. I know you saw some clever tuner remove the action without the cardboards. So what? I'm helping you avoid disaster. That tuner breaks hammers too! Go get the poster board, even if you have to drive down to WalMart for it. DO NOT try to substitute paper or corrugated box board-- too thin-- too thick!
Now, slide the pieces of poster board inside the action area so that they lay all the way over the hammers. As you slide the action out later, these poster boards will keep the hammers from popping up and getting caught on the pin block above the action, and thus we hope to avoid breaking off any hammers. Do this now so you won't forget.
Here is a trick you can use instead of the poster board:
I have two 3/8" dowels with a hole bored in them to slip over the Front Rail pin. This prevents the end keys from going down, when sliding the action in and out.
Editor: You might make the dowel with a hole for the last pin and a slot in the end of the dowel for the next front rail pin over. Raise the key lever up far enough to slip the dowel over the front rail pins. This trick assures that you will not bear down on the extreme right and left natural keys and bring those hammers up to be broken off. The only thing still at issue is that sometimes a hammer will be hanging up due to a problem in the action or something that fell into the piano. In this case, that particular hammer may break off when it gets to the under side of the pin block. So, take a good look if you use the dowel trick, and make sure a hammer across the middle is not up.
Remove the end blocks if they are not yet out (screws or wing nuts under the piano holding the pin block, or screws somewhere on top of the end blocks). This is a must because they are probably holding the action in place. If there are brackets under the end blocks holding the action in place, remove them. Mark the small end blocks so you put them back exaclty the way you found them. Some grand end blocks come out by removing a screw in the lower face of the end block exposed after the trim piece in front was removed. Remove the screws.
Next, look to see if there are any screws in the board under the front edge of the key bed-- the board right in front on which the keys with their green felts rest. If so, remove the screw or screws. Is there a wire bail which you can now pull out right in the middle. This is a handle to start the action moving out. Pull it out ready to use.
Go take a rest, and drink a cup of tea-- no beer. You need all your brain working.
Now, start working the action out of the piano. Do not pull on the keys. Use the wood frame under it to pull on. This may take some creativity at first since there may be very little to grab hold of.
In passing, notice one very refreshing thing about your piano-- there are not 35 of those OSHA and UL stickers all over it. You can stand on the top, play it standing up, throw it in the dump, or burn it in the back yard, all without so much as one question from the FDA, Health Department, or the BATF. The piano is one of the very few things left which has NO government regulations or controls on it. Ain't that sweet. Hug your Libertarian piano.
![]()
As you ease the action out, you will notice a drag, especially on the right side. This is normal. It is the spring along the right side which pushes the action back after you push down on the quiet pedal. Don't let this drag swing the action around skewed. Keep the poster boards right over the hammers as the action moves out, especially as they start under the pin block above them. Again, do not get the action cocked at an angle. Looking at the hammer or key angles as they emerge out of the piano may fool you. Use the KEY BED sides as a point of reference, keeping the sides parallel with the sides of the piano. TAKE IT EASY, the thing is not as deep as you might think. Get yourself ready to take hold of the two sides of the action and carry it away.
This is where we ask the important question-- when the action is halfway out, hanging in front of us, right-- "Where am I going to put this thing?" Yell, "Mable, clear the table." A big flat surface is essential. Don't leave part of the action unsupported.
Now, take a deep breath, and run off all well-wishing helpers. This is a one-person job please. As the action is nearly all the way out of the piano, you will be able to grab the outer edges of the key bed (NOT holding the keys or pushing them down).
Let the front of the action come to rest on the front of your thighs, and take the weight of the action in your hands as the hammers clear the piano, and back evenly away, not lifting until you can see ALL of the hammers are clear. Lay the action on the surface Mable got ready when you screamed for help halfway through this process.
Look there now, you did it. If you busted a hammer off, don't panic. Go to Chapter Seven, and find Hammer Repair. If you dropped the action on the floor, well check your yellow pages for a good piano tuner. If it's any comfort to you, I have a piano teacher customer in Tombstone, AZ who pulls her grand action for all her students to show them how it works. She has never broken a hammer.
After you get the action out, go back and see if there is a Lego block behind the spring on the right which holds that tension against the action. Also, check for pencils and junk back in the hole where the action was, and save any parts that look like they came from the piano. If there is an eight inch wooden rod with a rubber tip, that is not from your piano-- That is a pencil :-) After you inventoried all the leavings in the action hole, vacuum out the action area using your small paint brush to get all the dirt. Don't get rough with those parts in the back of the action area please.
If you have some graphite, now would be a good time to rub a little on each of the shiny rubbed spots where the action rests on the key bed. This will help the action to shift sideways better when your use the quiet peddle.
![]()
Simply follow the removal procedure in reverse. However; there are some things to watch for.
First, replace the keys into the piano.
Next, replace the upright action. There are cups in the bottom of the action's vertical metal braces or brackets. These fit down over the pegs (or wooden mounting points in very old pianos) sticking up from the key bed. Make your approach is fluid and steady, and try to set the cups on the pegs directly. One person job again. Do not drag the action around fishing for the pegs. You could damage the lower action parts. If you miss, back out eight inches, and move back down. It may take several tries, and your arms may get tired and shake, but direct contact is desired.
Re-seat the top ends of the action metal vertical braces so that they bottom on the bolts sticking out. You may have to tap them home if they are tight, then put the thumb screws back. Finish by reversing the disassembly process.
Reverse the removal procedure.
First. lay the poster boards over the keys again. You will have to use some force to get the action to start moving past the spring on the left holding the tension for the soft pedal. Once the action is in, see if any of the dampers are not working freely. If not, remove the action about four inches, put junk under the dampers to hold them up about a quarter of an inch, and push the action back in. Remove the poster boards, and let the dampers drop down into place.
If you have a "sostonuto sustain" (sustain individual keys), and the action refuses to go all the way in, again, put things under the dampers up top to lift them up out of the way. Then slide the action in, and let the dampers down into place.
If you have the drop action with the wire rods which are loose, and if your improvised string or stick fell off, try to get the rods back secured as they were when you took the action out. If you cannot, you can put it back as follows.
Grab the action and hold it with the rods hanging down in front of you. Approach the piano with the rods hanging just below the key level (keys out of the piano and newspaper laying over the key center and front pins). Move forward slowly letting the rods drag up and over the key bed (keys out of the piano). As the action approaches its hole area, slowly lower it into the hole. The rods should flip right in place as the action comes to rest on its support pins. Problem: If you cannot finish the journey for some reason, you will destroy parts of the action trying to get it back out. I don't like this method, but it works for some tuners.
Reconnect the tops of the rods to the back ends of the key levers. Make sure none of them are crossed, or you will have a lot of Chinese music later.
Read the upright section above about bringing the action to rest on the support pins.
![]()
Read the upright section above. Nothing is different.
![]()
Reconnect all the pedal sticks on all uprights, possibly working from below. Adjust the nuts on the vertical metal rods, connecting the pedals to the wooden horizontal levers in the bottom of the piano, so that there is just a tiny bit of lost motion in the pedal sticks. Exception: Some pianos will have a very extreme movement in the dampers if all of the slop out of the stick's movement. If so, leave some slop so that the damper mechanism is not being overworked. But, then the stick may rattle. A gob of GE silicone at the top of the stick will help.
On the grand piano, get under it and adjust the pedal rods in the lyre if there is poor action in the damper or quiet pedals. Do this by lengthening the rods using the adjustment nuts provided. If there are no adjustment nuts, glue a bit of leather, or a shim cut from an old boot, where the rods meet the wood levers mounted under the piano.
During this whole disassembly and reassembly process, your actual problem will come to light. To fix it, browse the Table of Contents to see where, in the rest of this book, you can find the instructions to make repairs or adjustments.
Go make a pot of coffee and invite uncle Harry over so you can brag on how well you did. OR, maybe uncle Harry can help you finish the job where you got lost :-) Remember, the bribe is pizza.
![]()
![]()
![]()
![]()